How to Capture GCLID and Other URL Parameters in JotForm Using Wix and Velo: A Step-by-Step Guide.
Overview
Tracking dynamic URL parameters like gclid (Google Click Identifier) is essential for understanding the impact of ad campaigns. When using JotForm embedded within Wix, capturing URL parameters can be a challenge, but with the help of Wix’s Velo code, you can pass these parameters into JotForm fields seamlessly. If you need any help, please contact me.
This guide will walk you through:
Setting up your Velo code to dynamically read URL parameters. Embedding JotForm with options to pass parameters directly.
Prerequisites
- Enable auto tagging in your Google Campaign settings
- Velo enabled on your Wix website (for JavaScript coding)
- JotForm form embed code and either an HTML iframe or a site embed element in Wix
- Familiarity with URL parameters and template literals
Why someone might choose JotForm over Wix's native forms
For many users, JotForm offers an appealing option due to its rapid setup and highly customizable templates that make form creation accessible even for those with minimal coding knowledge. Long-time JotForm users, like my client, may prefer to stick with it even after moving to Wix due to familiarity, ease of use, and the ability to continue leveraging integrations and form-specific features they’ve come to rely on. JotForm's features, such as advanced conditional logic, extensive third-party integrations, and specialized fields, make it ideal for creating complex forms quickly.
Step 1: Enable Auto-Tagging in Google Ads
If you don't need to read GCLID data and you just want to capture custom url parameters in your hidden form fields then you can skip to step 2. Otherwise ensure that auto-tagging is enabled in Google Ads to automatically add the GCLID to your ad URLs.

What is Auto-Tagging?
Auto-tagging is a feature that attaches the Google Click Identifier (GCLID) to URLs, allowing tracking tools like Google Analytics to report detailed ad performance data. The GCLID allows you to:
- Track offline conversions
- Identify the ad and keyword that generated the click
- Measure ad performance in tools like Google Analytics
- Import advanced conversions into Google Ads
How to Enable Auto-Tagging:
- Log in to your Google Ads account.
- Click Admin in the left menu, then go to Account settings.
- Under Account settings, select Auto-tagging.
- Ensure the box next to Tag the URL that people click through from my ad is checked. This confirms auto-tagging is active.
- Click Save to apply the setting.
With auto-tagging enabled, your URLs will now include the GCLID parameter, making it easy to capture click data in JotForm.
Why you need GCLID tracking
GCLID (Google Click Identifier) is crucial for optimizing conversion value because it provides detailed tracking of user interactions with your ads. Here's how it helps:
Tracking Specific Conversions: When you capture the GCLID along with form submissions, you can later link those submissions to specific ad clicks. This allows you to track which ads are generating leads that convert into actual sales or deals.
Attributing Conversion Value: By providing Google with the dollar amount for each deal that originated from a specific lead, you enable more accurate attribution of conversion value. This means that Google can analyze the performance of your campaigns based on actual revenue generated, not just lead counts.
Enhanced Machine Learning: Google uses this conversion data to optimize its ad targeting and bidding strategies. By understanding which leads are more likely to convert into high-value deals, Google can find more users similar to your best customers, improving overall campaign performance.
Data-Driven Insights: The data captured through GCLID enables you to analyze the return on investment (ROI) for your ad spend more effectively. You can adjust your marketing strategies based on real-world performance rather than assumptions, leading to better decision-making.
Overall, GCLID facilitates a feedback loop that helps improve your ad campaigns and maximize conversion value.
Step 2: Create the Jotform Form
- Create a New Form: In your JotForm dashboard, start by creating a new form, or select an existing form to update.
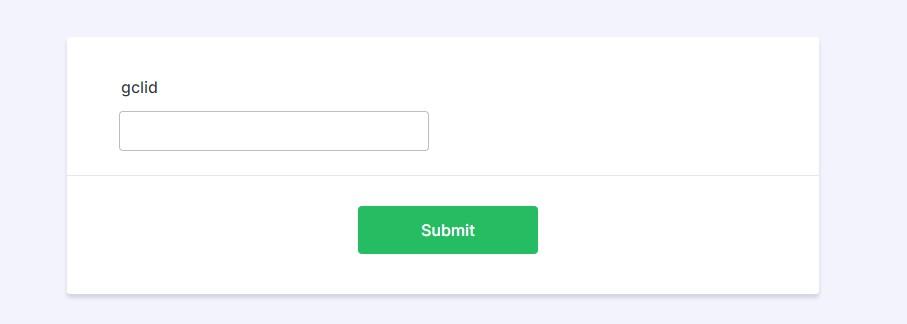
- Add a Short Text Field: In the form editor, add a Short Text field. This will serve as the GCLID field where the URL parameter will be captured.
- Set the Field Label: Label the field gclid to make it easy to identify.
- Visibility for Testing: While you’re testing, keep this field visible to confirm it’s working. You can hide it later once it’s capturing data correctly.
Step 3: Set a Unique Field Name for URL Pre-Population
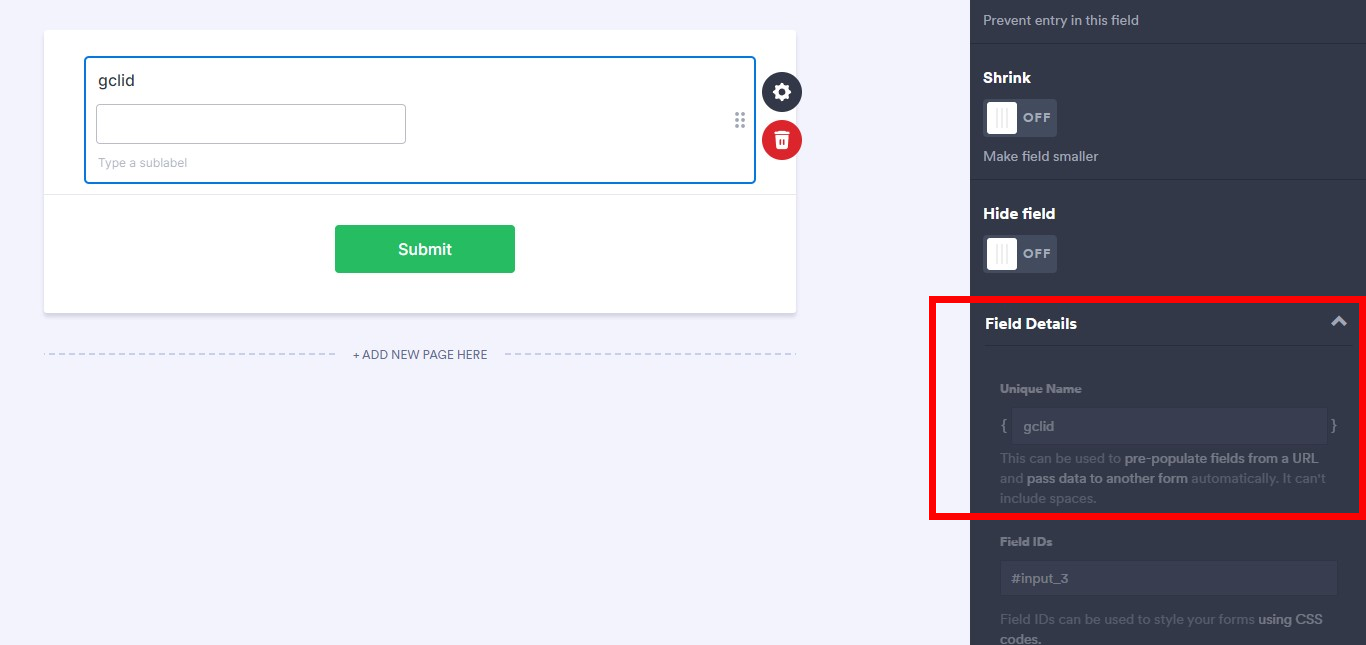
- Click on the GCLID field, go to Advanced settings, and open the Field Details section.
- Set the Unique Name to gclid. This will allow JotForm to populate the field directly from a URL parameter. Setting a unique name is essential for pre-filling form fields using URL parameters, making it easy to capture GCLID values from Google Ads clicks.
Step 4: Embedding JotForm in Wix and Adding Velo Code
To pass the GCLID parameter from the URL to JotForm in Wix, follow these steps:
- Embed JotForm: I do not recommend using WIX's HTML iFrame option in the 3rd party Publishing Options because it was giving me trouble getting the url parameters from the embed. I got it to work using the postmessage() method but I found it far easier to use the first Embed option you see in the below image which is embedding it with a script tag. When you copy and past this in WIX you will append the
?gclid=${gclid}to the src for dynamic updates.
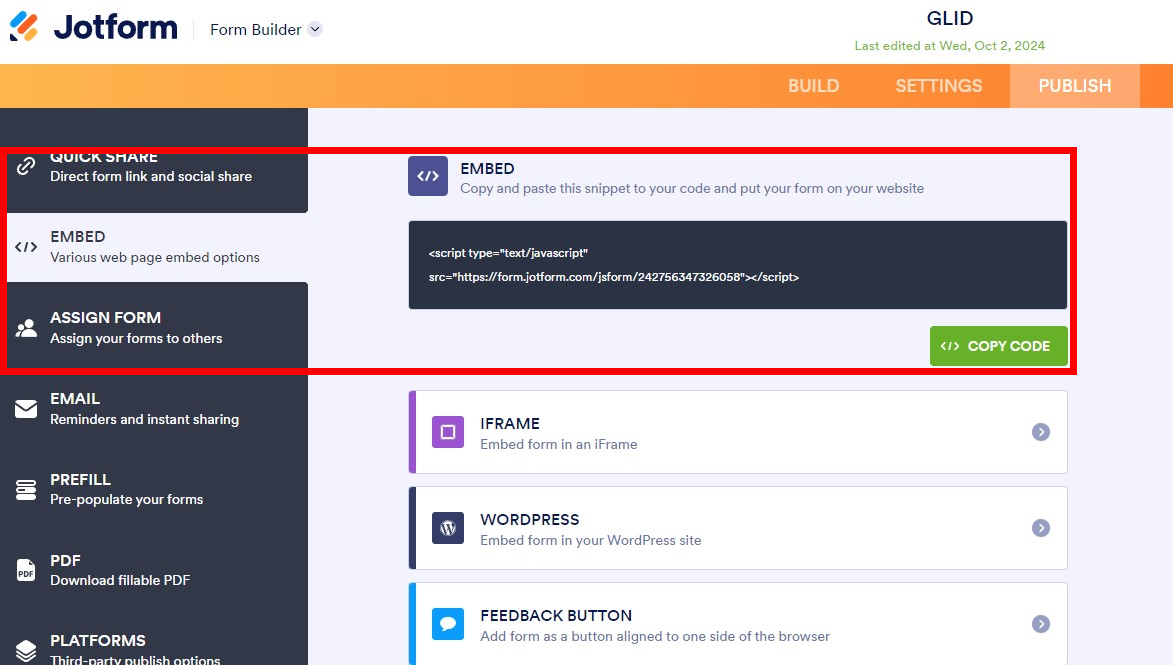
Go to the Wix editor, add an HTML iFrame element, and embed the JotForm URL directly. Be sure to append ?gclid=${gclid} to the URL for dynamic updates.
If you embed using code you have to use the backticks around the script to pick up url parameter
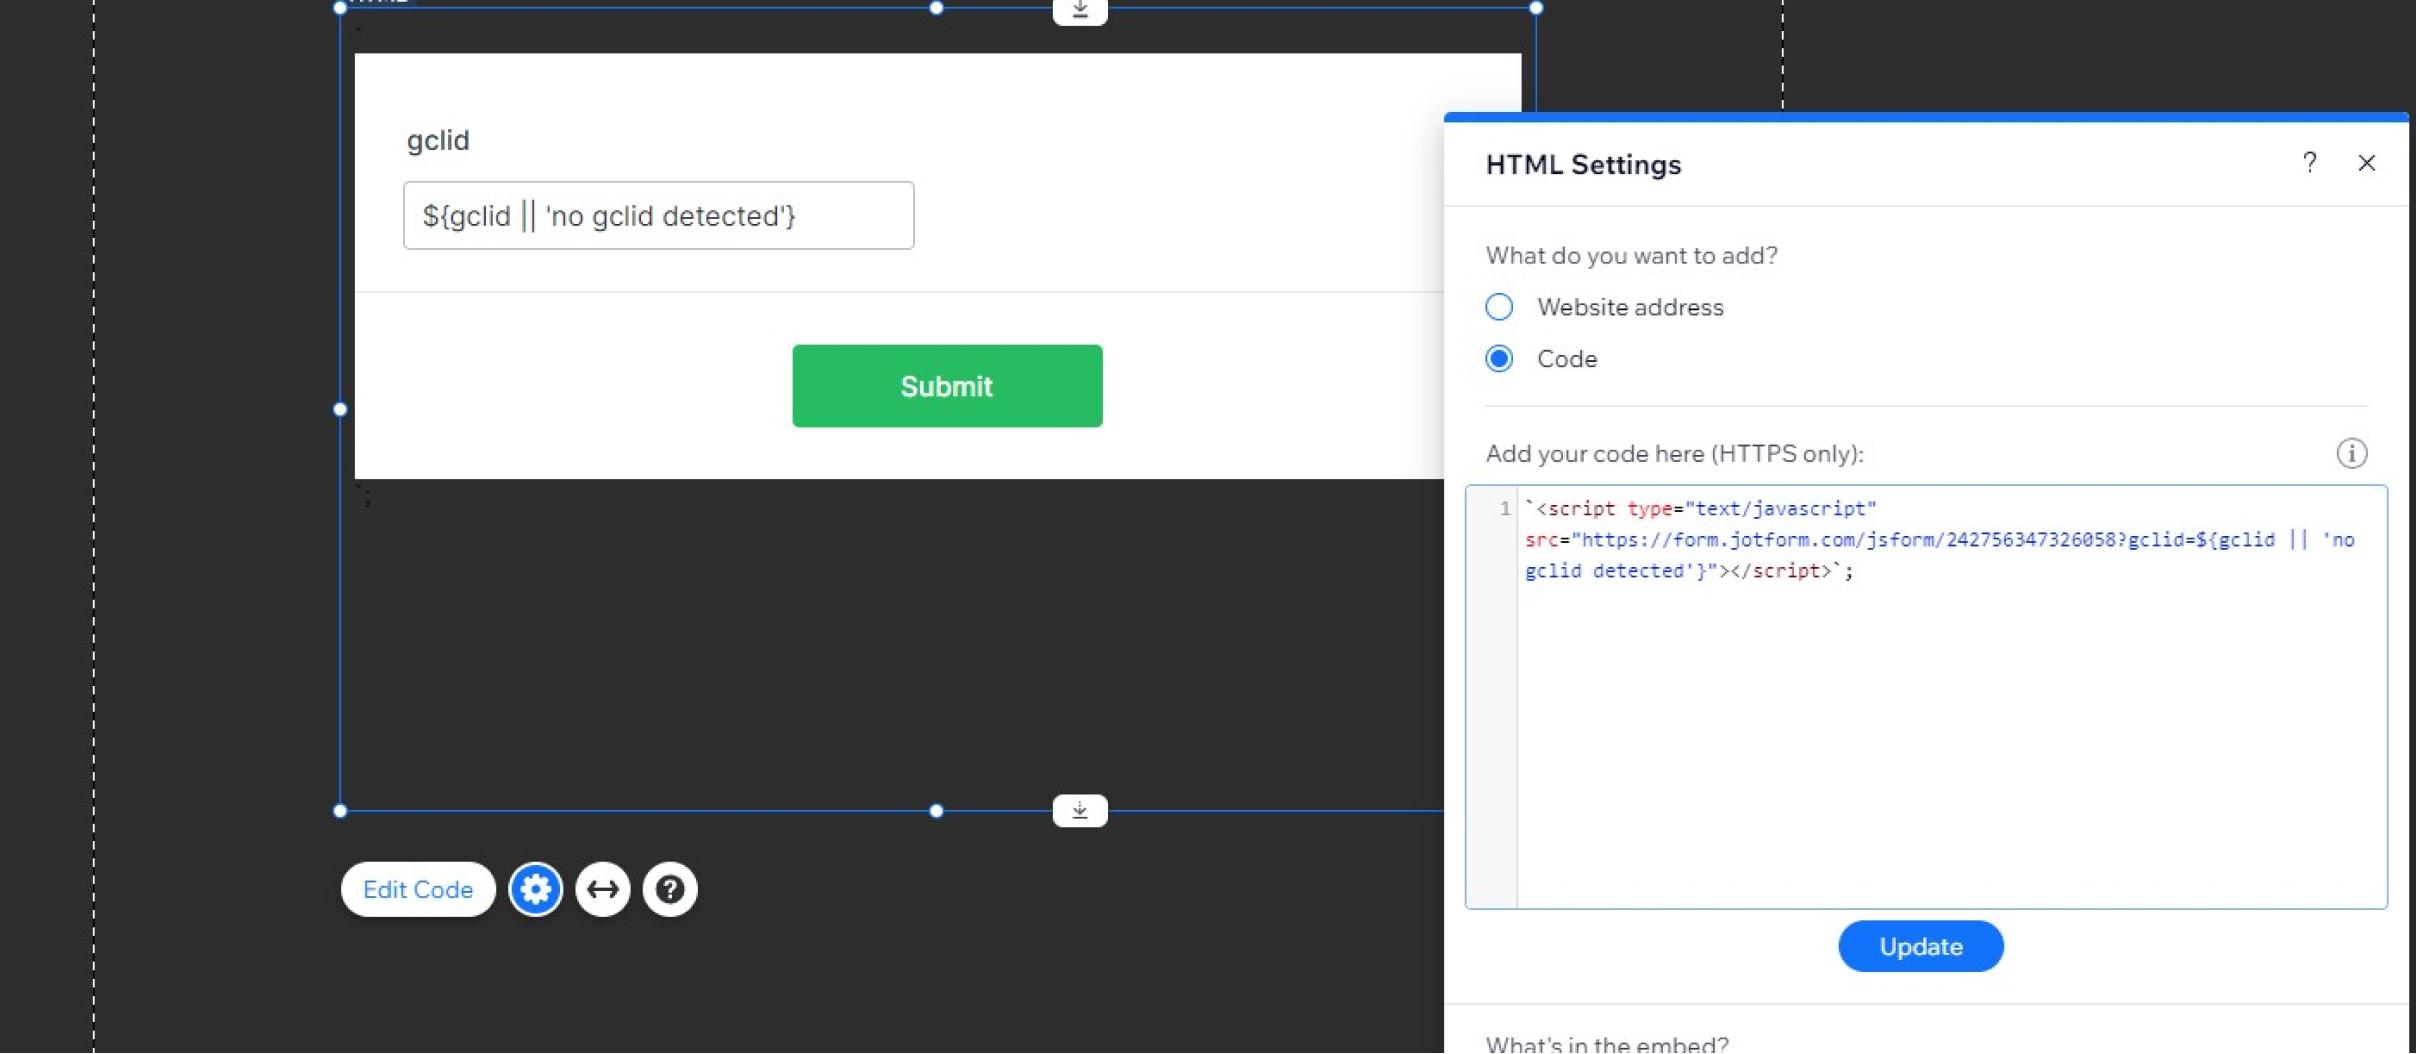
OR embed the form as a website address and add ?gclid=gclid or whatever custom parameter you have set up
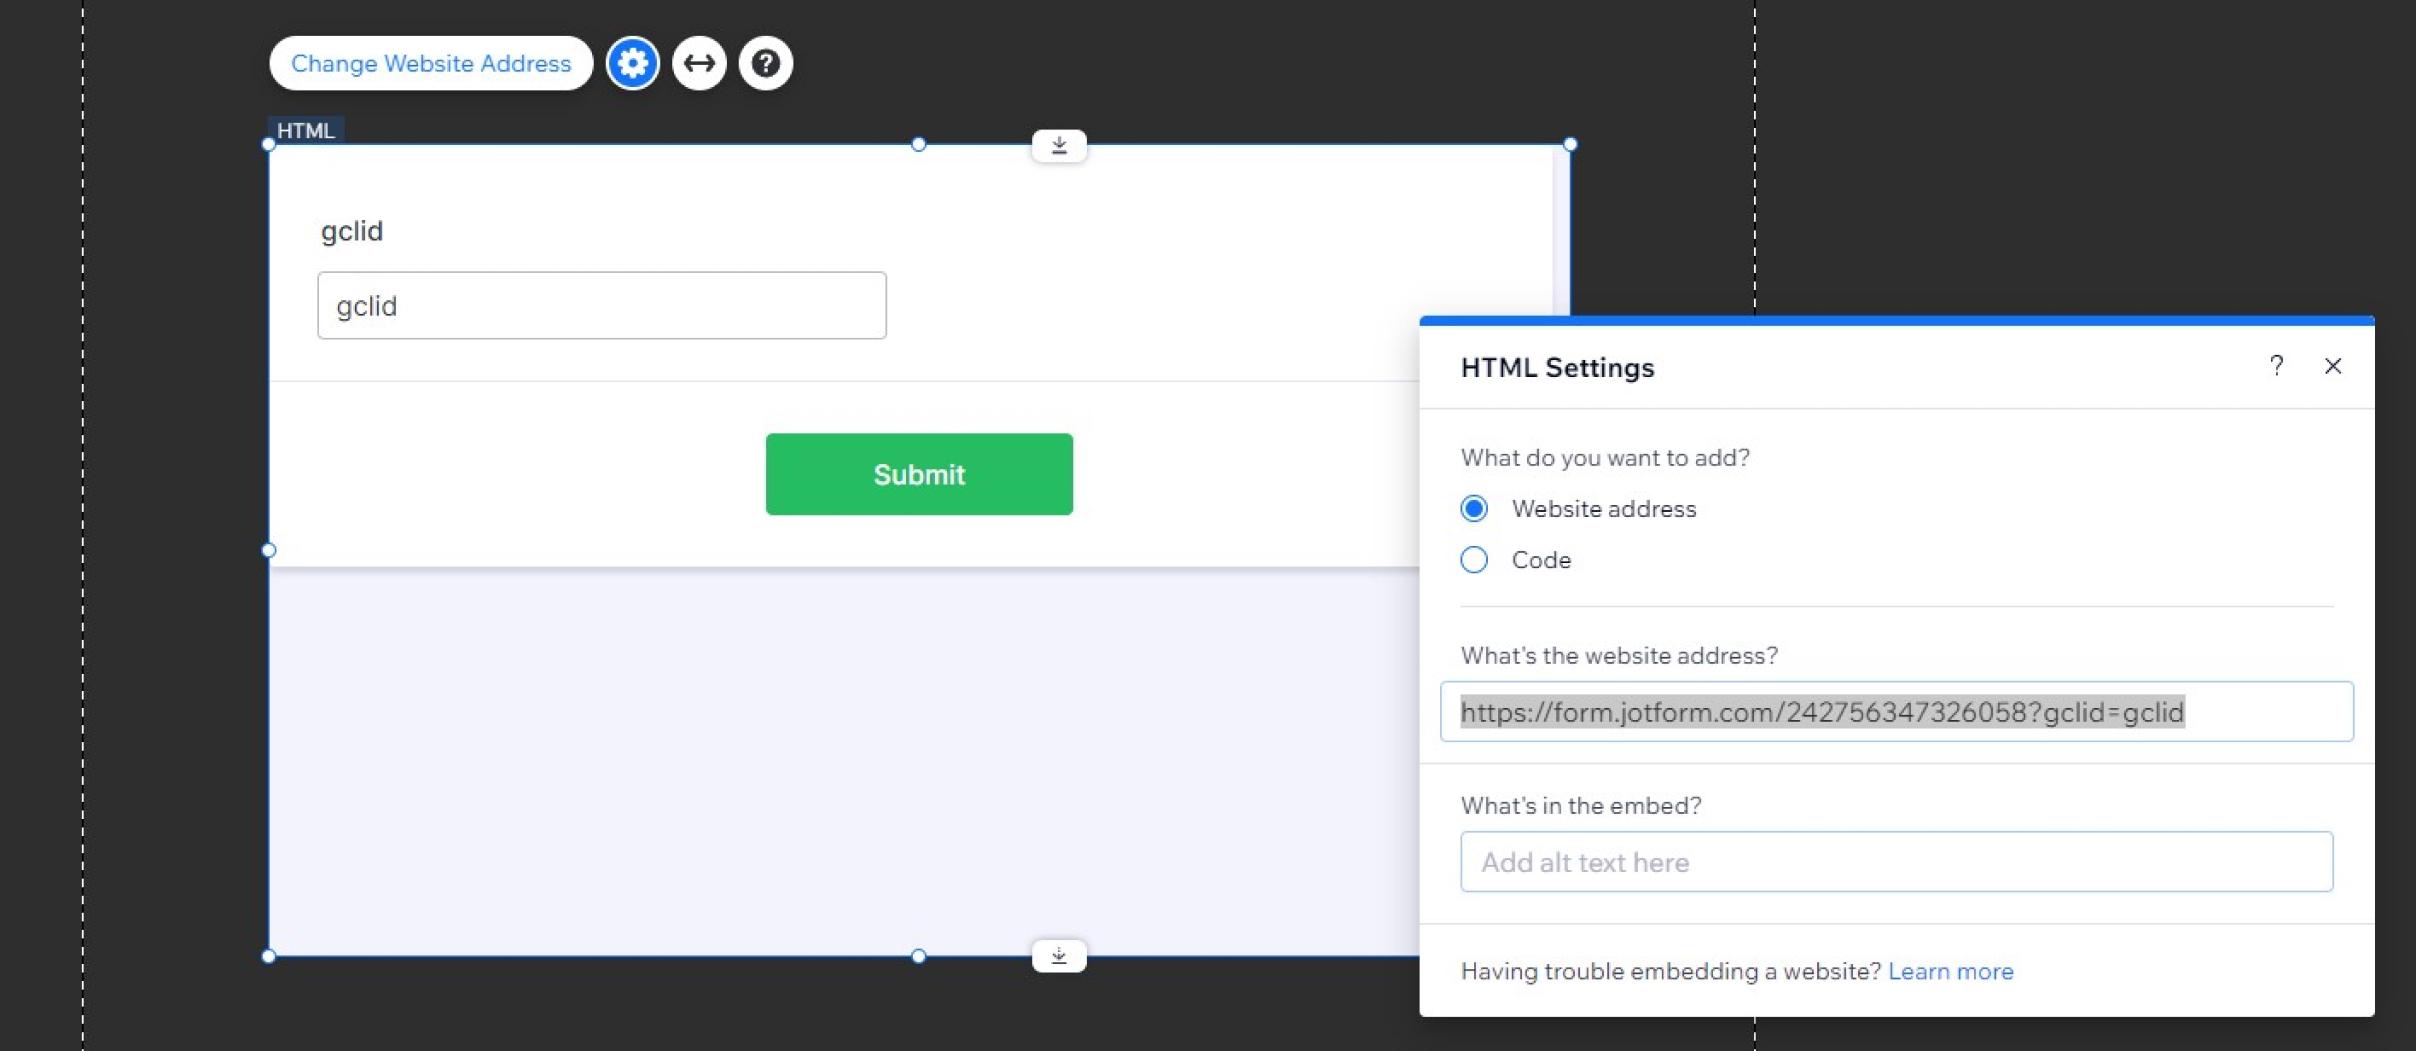
Step 4: Accessing URL Parameters with Velo
Using Velo’s wixLocation module, we’ll access the gclid parameter from the current page URL. This code example captures the gclid and dynamically updates the iframe source to include it, ensuring that the JotForm receives the data. WIX Location API Documentation
Here’s a look at the Velo code we’ll use:
// Velo API Reference: https://www.wix.com/velo/reference/api-overview/introduction
import wixLocation from "wix-location";

$w.onReady(function () {
    // Get the gclid parameter from the current URL query
    const gclid = wixLocation.query.gclid;

    if (gclid) {
        // Select the JotForm iframe element by ID
        const iframe1 = $w("#html1"); // ID for the first iframe
        if (iframe1) {
            iframe1.src = `https://form.jotform.com/242756347326058?gclid=${gclid}`;
        }

        // For additional iframes (optional)
        const iframe2 = $w("#html2"); // ID for a second iframe, if needed
        if (iframe2) {
            iframe2.src = `https://form.jotform.com/242756347326058?gclid=${gclid}`;
        }
    }
});
Turn on Dev Mode in wix and add the above code:
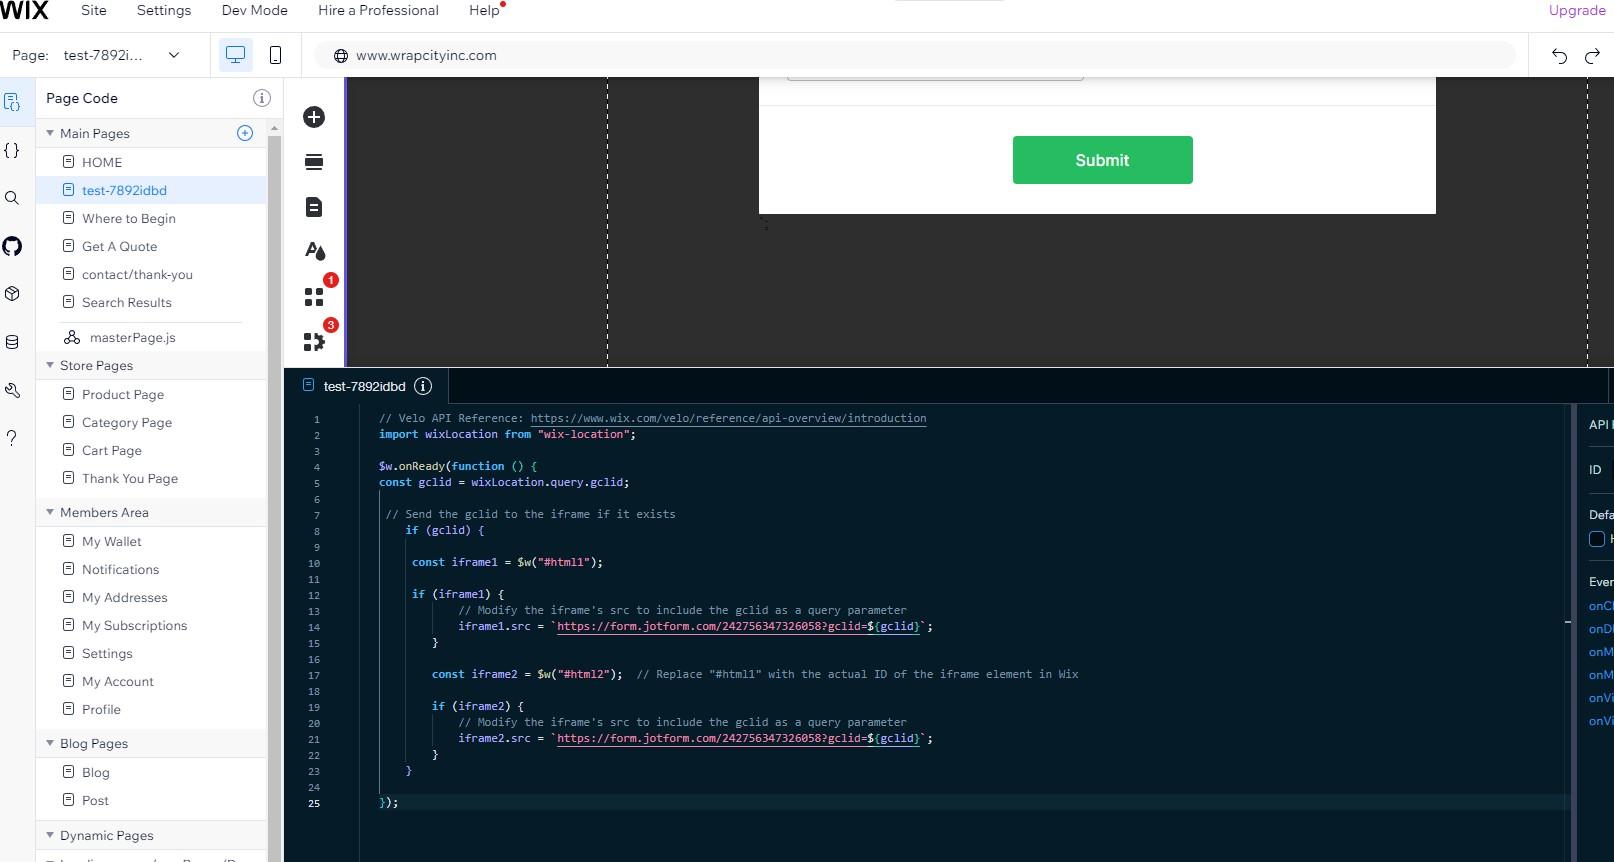
This code dynamically passes the GCLID (Google Click Identifier) parameter from the URL to your JotForm embedded in a Wix site.
Why do you have to use this code?
Without this code, the embedded JotForm iFrame cannot access or read URL parameters on its own because it’s isolated in its own scope, separate from the Wix page's URL data. By using the Velo code to read the URL parameters and inject them into the iFrame’s src attribute, we pass the GCLID value directly into the form. This approach enables JotForm to access and use the GCLID for tracking purposes without needing to look outside its embedded scope.
Here’s a breakdown of why each part is needed:
Retrieve URL Parameters: The code uses the wixLocation.query.gclid to get the GCLID parameter from the current URL. This parameter is automatically added by Google Ads auto-tagging, enabling tracking of ad clicks through the GCLID.
Embed GCLID in Form Iframes: If a GCLID exists in the URL, the code locates two HTML iFrame elements (iframe1 and iframe2) on the Wix page. The GCLID is added to the src (source) URL of each iframe, allowing the JotForm form inside to capture and store the GCLID.
Track Google Ads Data in Form Submissions: By adding the GCLID to the form URL, the JotForm can store it within the form submission data, allowing you to later analyze which Google Ads clicks generated specific leads or conversions.
This setup is essential for businesses that need accurate ad performance tracking, as it connects specific ad clicks to user actions on the form, providing valuable insights for ad campaign optimization.